Android Wear extends the Android platform to wearables. With Android Wear, you can add wearable notifications, create wearable apps, and create watch faces.
To start developing for Android Wear, you would need to download and setup Android Studio. You also need to download the following packages using your SDK Manager:
- Tools > Android SDK Tools 23.0.0 or higher
- Tools > Android SDK Platform-tools 23.0.0 or higher
- Tools > Android SDK Build-tools 23.0.0 or higher
- Android 4.4W (API 20) or higher > SDK Platform
- Android 4.4W (API 20) or higher > Android Wear ARM System Image
- Android 4.4W2 (API 20) or higher > Android Wear Intel System Image
Setting up Android Wear Device
Pair your handheld to your Android Wear Device using the Android Wear app. Enable USB debugging on the wearable by tapping the Build number seven times (in Settings > About). Go to Developer options and enable ADB Debugging. You can connect the wearable to your computer via USB or via Bluetooth.
Setting up Android Wear Emulator
If you do not have an Android Wear device, you can create an emulator. To create an Android Wear Virtual Device:
- Open the AVD Manager and click the Create Virtual Device...
- Select Wear in the Category and choose between Square, Round Chin, and Round. Click the Next button.
- Select the release name (e.g. Lollipop) then click the Next button.
- Rename the virtual device (if you like) and change any coniguration based on your preference.
- Click the Finish button to create the emulator.
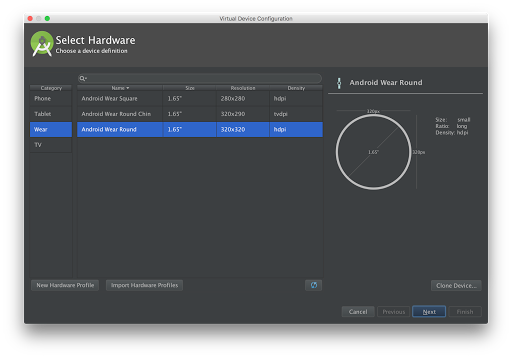
Creating an Android Wear Emulator
You can now start this emulator and pair it to your handheld. Connect the handheld to your computer via USB and run adb -d forward tcp:5601 tcp:5601 (this forwards emulator's communication port to the handheld). Open the Android Wear app in the handheld and connect it to the emulator.
Creating An Android Wear Project
To create a new Android Wear Project on Android Studio and follow the following steps:
- Click New Project in the Welcome Screen (or File > New Project if you already have an open project).
- Fill up the project name and package name, then click the Next button.
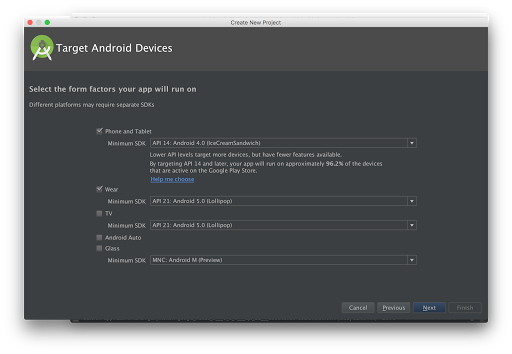
- Check Phone and Tablet and select the Minimum SDK.
- Check Wear and select API 20: Android 4.4 (KitKat Wear) or higher as the minimum SDK
- Click the Next button.
- In the Add activity to Mobile window, select Blank Activity then click the Next button. You can change the activity name, layout name, and title.
- In the Add activity to Wear window, select Blank Wear Activity then click the Next button. You can change the activity name, and the layout names.
- Click the Finish button.
Creating an Android Wear Project
Run the mobile module to run it in your phone or tablet device (or emulator). To run and view the wearable app, run the wear module and choose your emulator. You will see something like the one below:

To learn more about developing for Android Wear, take Udacity's Android Wear Development course, built by Google. You can also join the Android Wear Developers Google+ Community
No comments:
Post a Comment