August 27, 2015

Genymotion Android Emulator

Have you tried using Android Virtual Devices (commonly known as Android Emulators) and experienced how it can be really slow most of the time? Using a real device to run your Android apps is usually faster and more efficient. However, not everyone has access to a lot of phones and tablets for testing their Android apps. Also, using an actual device and displaying the contents into your computer (like when presenting your apps to an audience) takes time and is error-prone. Another alternative to using the native Android emulator or a real- device is Genymotion.


Genymotion is a fast and easy-to-use Android emulator to run and test your Android apps. Already being used by more than 2,500,000 developers, Genymotion has 20 pre-configured devices (Nexus, HTC, LG, Motorola, Samsung, and Sony). You can also create customized phone/tablet emulators. You can also integrate it to Android Studio by installing the Genymotion plugin.


One of the cool things I like about Genymotion is that you can drag and drop an APK file into an emulator and it will automatically install it. Genymotion runs fast (even if you run multiple devices at the same time) and has a user-friendly interface. You can control sensors like battery, GPS, and accelerometer, network quality and performance, microphone, and multi-touch. It also has Java API and command-line tool.

Installing Genymotion

Genymotion is available for Windows, Mac OS X, and Linux. Your computer should have VirtualBox installed. You can download VirtualBox here.

Go to the Genymotion Downloads Page and download the one for your computer's operating system. You need to create an account to download Genymotion. There is a paid version of Genymotion but the free version is good enough for development and testing your apps.

On Windows, run the exe file you downloaded and follow the on-screen instructions. The default installation directory is C:\Program Files\Genymobile\Genymotion. If you created a Start menu folder, you can go to the Start Menu to open Genymotion. You can also click the desktop icon if you created one during the installation.

On Mac, open the dmg file you downloaded. Drag and drop Genymotion and Genymotion Shell to the Applications directory. On Linux, run the following commands:

chmod +x <Genymotion installer path>/genymotion-<version>_<arch>.bin
cd <Genymotion installer path>
./genymotion-<version>_<arch>.bin -d <Genymotion installer path>


You can run Genymotion by going to the installer path and running ./genymotion

Once you have installed Genymotion, you can now create new emulators, start them, and select them in the Device chooser window when running your application.

Genymotion Plugin for Android Studio

If you are using Android Studio, you can use Genymotion directly in the IDE. You can install the Genymotion Plugin so you won't need to open Genymotion and switch tabs while developing your app.

To download the Genymotion plugin, start Android Studio and go to File > Settings (Android Studio > Preferences on Mac). Select Plugins and click Browse repositories. Select Genymotion, click Download and install to download the plugin. Upon installation, you will see the Genymotion plugin icon in your toolbar.


Genymotion Plugin Toolbar Icon

To use the plugin, click on the icon. If you are running it for the for the first time, you will be asked to to select the path to the Genymotion directory. Browse to your installation directory (something like C:\Program Files\Genymobile\Genymotion for Windows, /Applications/Genymotion.app for Mac, and /home/jomartigcal/genymotion for Linux). Click OK.
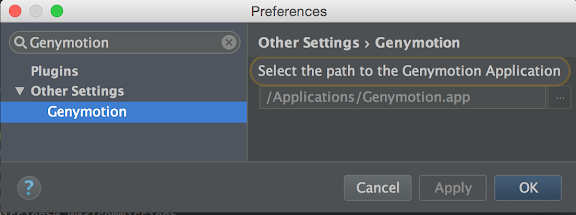

Genymotion Android Studio Plugin

If you have already specified the location of Genymotion, clicking the toolbar icon opens the Genymotion Device Manager where you can create new emulators and start existing ones.


August 26, 2015

Google Developers Summit Manila

Google Developer Relations team organized Google Developers Summit Manila last August 14, 2015. Google Developers Summit is a premier developer event hosted by Google where they together speakers from across the globe to deliver technical talks on latest topics around Android Application Development, Material Design, The Google Cloud Platform, understanding Play policies & best practices and many more useful topics.

Amit Chopra, Google Developer Relations Program Manager was the host of the program. There was a brief welcome remarks from Kenneth Lingan, the country manager of Google Philippines before the two morning talks of Amrit Sanjiv, former Google Developer Expert for Android who is now a Google Developer Relations Program Manager. Amrit's first talk is about the top features and new APIs of Android M and Android Developer Tools and the other is about Material Design.

Sacha Carina van Ginhoven, an Xoogler who has founded a UX Design business in Singapore facilitated the Material Design Rapid Prototyping Workshop in the afternoon, along with Amit and Amrit. We were grouped into teams of 6 and we made material design prototypes for the unofficial Pinoy Henyo app, whose developer is in our team.


Our team in the Prototyping workshop (Photo taken by Reymart)

The last talk was Building a successful business with Google Play by Vineet Tanwar from the Business Development Team for Play Games and App. Amit closed the program after a few closing remarks.

This was the first Google Developers Summit in the Philippines. Hopefully, there could be more (and with more talks/speakers) in the future!


August 7, 2015

Android Masters Android App Development Challenge

During the Google I/O 2015 Extended Roadshow, GDG Philippines has launched Android Masters, a National Inter-School Android App Development Challenge.


Android Masters is a collegiate inter-school Android app development challenge. It is open to all universities and colleges across the Philippines. The main objective of the program is to encourage students to develop their creative app ideas and publish it to Google Play Store.

If you are interested to join Android Masters, check the details at the Android Masters website (http://androidmasters.gdgph.org/) and add GDG Philippines in your Google+ circles.


August 6, 2015

Publishing Android Apps on Google Play

So you've made a cool Android app or game. However, it is only available in your phones and emulators. You should publish it on Google Play, the official Android store, so it can be available for download to Android users in more than 190 countries.


Image Source: Wikipedia

Google Play Developer Account

To start publishing your apps on Google Play, you need to register for a Google Play developer account at https://play.google.com/apps/publish. You need to login with your Google account first. Read and accept the Developer Distribution Agreement.

A one-time fee of $25 using a Google payments account is required. If you do not have a Google payments account yet, you will be prompted to set up one. You would need a credit card or a debit card for this. In the Philippines, you can use GCash MasterCard or SMART Money MasterCard if you do not have a credit nor debit card. After payment, you need to update your account details. You can now start publishing your apps.

Google Payments Merchant Account

If you want to sell apps, in-app products or subscriptions, you need a Google Payments Merchant Account. This is not available in all countries. You can check the list of merchant countries here.

From the side navigation in the Google Play Developer Console, click the Reports icon . Click Financial Reports and then click Setup a Merchant Account now.

Google Play Developer Console

To publish your apps, you need to go to the Google Play Developer Console. This is where you will upload and manage your Android apps.

To publish a new application, click the Add New Application button. Provide the default language and the name of the application. You can then Upload APK or Prepare Store listing.

In Upload APK, you should upload your Android Package (APK) file signed with your release keystore. In Store Listing, you should provide the title, description, icon, screenshots, videos, category, and privacy policy of the application, along with your contact information and other details. In the Pricing and Distribution section, you can set if the app is free or paid (and the cost), the countries where it can be available, and other distribution options. A new section is Content Rating. You will need to answer a set of questions related to the app. It will then give your app a content rating.

After you have finished the above steps, you can click the Publish app button to publish your app. It will take a while before your app can be available on Google Play.

It is easy to publish your Android apps on Google Play. However, before publishing your apps, you should test your apps for crashes and bugs, make sure your app follows the Core App Quality guidelines. You can find pre-launch essential tasks here.


August 2, 2015

Google I/O 2015 Extended Roadshow

Google I/O is Google's annual developer conference, where they share the latest products and technologies. This year, GDG Philippines brought the Google I/O experience to Manila and different provinces. The Google I/O 2015 Extended Roadshow is a series of workshops and talks centered around the technologies announced during Google I/O 2015. It was held in Pampanga (July 4), Manila (July 11), Batangas (July 18), Albay (July 25), Camarines Sur (July 26), and Cavite (August 1).


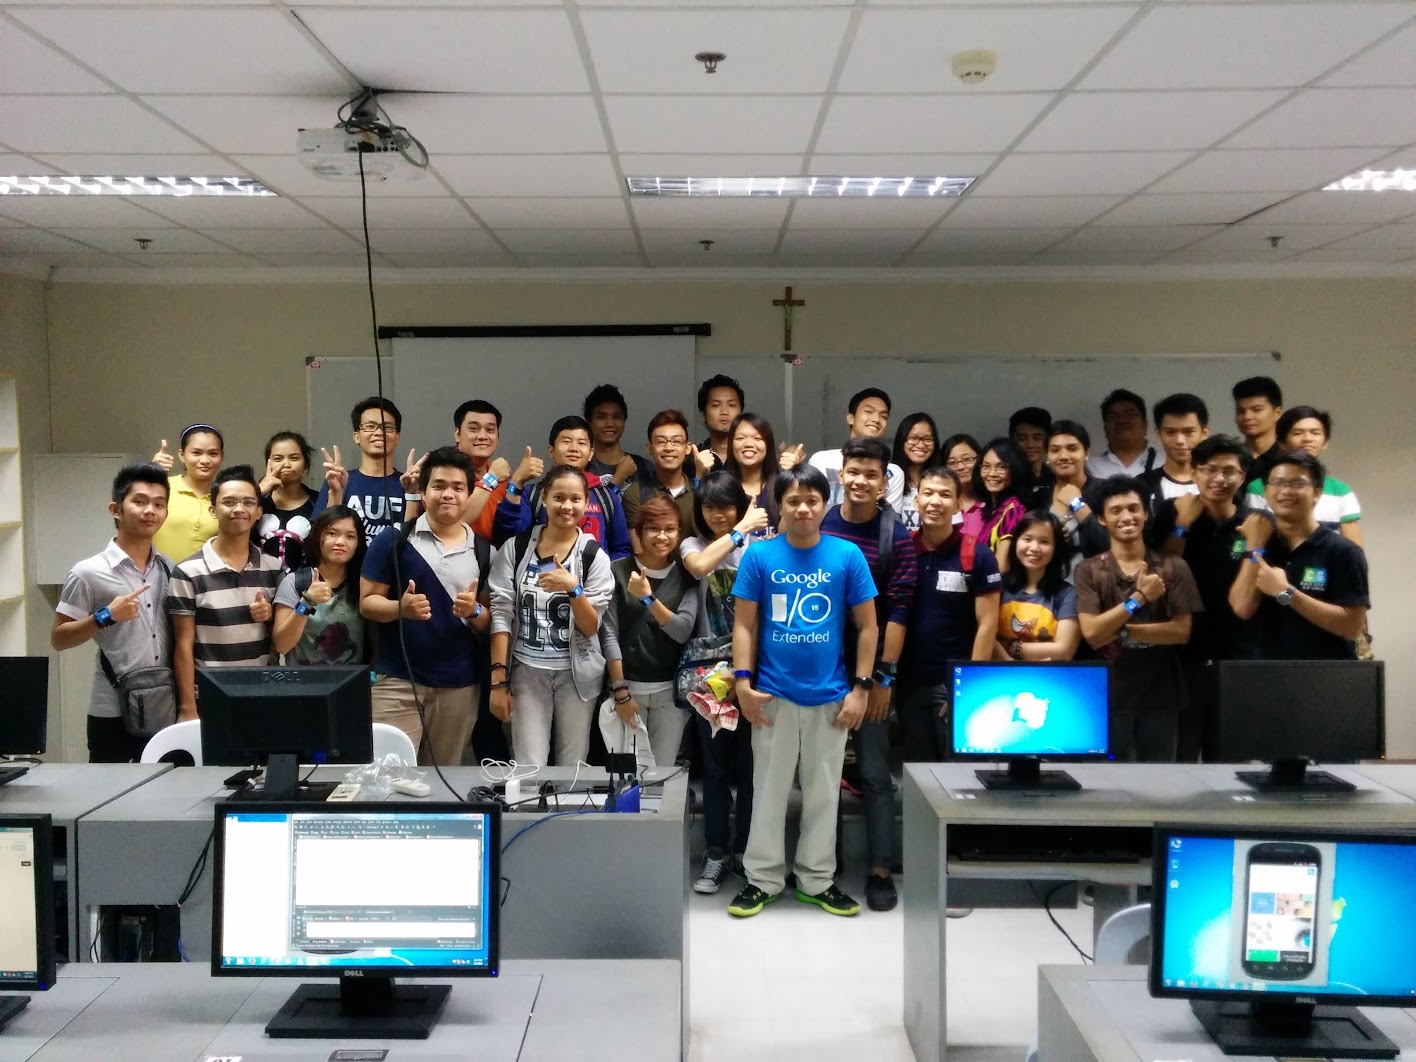
In each Extended events, we had talks in the morning and hands-on workshops in the afternoon. Morning plenary talks include the keynote, Google Cardboard and Google Translate Community. Workshops include Design Thinking and Rapid Prototyping, Web, and Android. In all six legs, I talked about the basics of Android apps development and facilitated hands-on sessions.

Pampanga


Creating Android Virtual Devices (Emulators)


Participants in the Android workshop in I/O Extended Pampanga

Manila


Encouraging participants in the Manila leg Android workshop to join Android Masters

Batangas


Participants in the Android workshop in I/O Extended Batangas

Albay


Participants in the Android workshop in I/O Extended Albay

Camarines Sur


Participants in the Android workshop in I/O Extended Camarines Sur

Cavite


Using white board and marker in the discussion


Participants in the Android workshop in I/O Extended Cavite